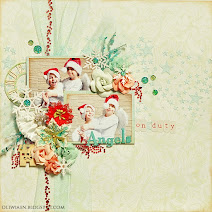
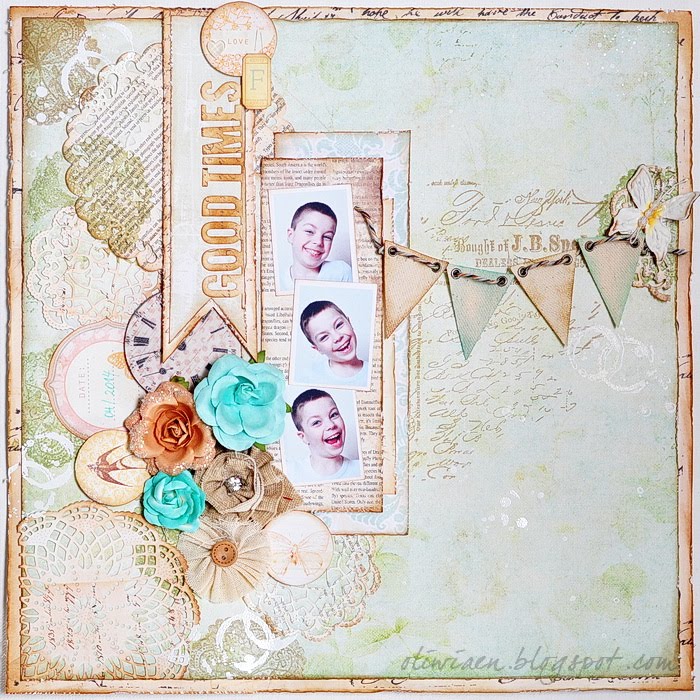
Delikatny, bez zbędnych ozdób - i znów Naval Treaty w nie-morskich klimatach :-)
Delicacy, no unnecessary embellishments - and the Naval Treaty collection for a non-marine theme again :-)
Folder ma być przede wszystkim praktyczny, ale kilka kwiatuszków, filigranowa ramka i przeszycia nie zaszkodzą ;-)
The folder is to be first of all for practical use, but a couple of flowers, filigree frame and some sewing doesn't hurt, right? ;-)
I wnętrze:
And the inside:
Nie zapomnijcie też kliknąć w bannerek na górze - dzisiaj ostatni dzień candy z Maja Design!!
Don't forget to click the banner above - it's the last day of the Maja Design candy!!
Miłego weekendu :-)
Have a nice weekend :-)
sobota, 30 sierpnia 2014
środa, 27 sierpnia 2014
You&Me, Together + aukcja specjalna
Chociaż do mediów podchodzę z dużym dystansem i niewiarą w swoje możliwości ;-)) to mgiełek używam naprawdę często, dlatego też praca na najnowsze wyzwanie w Craft4You nie była szczególnie kłopotliwa :-)
Although I usually keep media at a distance and don't believe in my strength in using them ;-)) I use mists really often, and so my sample for our latest challenge at Craft4You was not that difficult :-)
Wyzwanie wymaga użycia przynajmniej jednej mgiełki tak, by była widoczna. Ja użyłam w sumie trzech: złotą Heirloom Gold spryskałam arkusz bazowy, miętową Mint na środkowy arkusz, a czarną Black Marble naniosłam przy pomocy maski wzór damaska na papier bezpośrednio pod zdjęciem. Najlepiej widać to tu:
The challenge requires using at least one mist so that it's visible in the creation. I used three: sprayed the golden Heirloom Gold onto the background paper, the mint Mint one onto the matting sheet and using a stencil and the Black Marble mist I added the damask pattern onto the paper directly under the photo. It's best visible here:
Dwie pierwsze mgiełki pochodzą z serii Perfect Pearls, a czarna z serii Dylusions. O ile mgiełki z kolekcji Perfect Pearls mają bardzo subtelne kolory, dając głównie połyskującą powierzchnię (mgiełka Heirloom Gold jest tu wyjątkiem, jest dość mocno kryjąca i metaliczna), tak mgiełki z serii Dylusions nie mają połysku, za to są mocno pigmentowe, jak farba w płynie. Weźcie to pod uwagę, dokonując wyboru w sklepie :-)
The first two mists come from the Perfect Pearls series, and the black one from the Dylusions collection. And while Perfect Pearls have very subtle colours and add a shiny surface (the Heirloom Gold is exceptional, being quite opaqu and metallic), the Dylusions mists aren't glimmery, but they are heavile pigmented, like liquid paints. Take tht into account while shopping :-)
A wracając do LO:
And back to the LO:
Na kwiatach, które nie pasowały mi kolorystycznie, dobrze widać metaliczny efekt Heirloom Gold:
You can see the Heirloom Gold metallic effect on the flowers that didn't match the colour palette:
Podlinkowane materiał znajdziecie w moim poście na blogu C4Y.
You can find linked supplies in my post on the C4Y blog.
A jeśli podobają się Wam moje scrapy i chcielibyście mieć jeden, wykonany specjalnie dla Was, a przy tym wspomóc leczenie synka naszej koleżanki Vairatki - zalicytujcie w aukcji na rzecz Stasia :-) Dla zwycięzcy aukcji zrobię layout z dostarczonym zdjęciem i według uzgodnionych szczegółów. Pamiętajcie - im wyższą cenę osiągnie layout, tym większą szansę ma Staś, by uczestniczyć w rehabilitacji.
Although I usually keep media at a distance and don't believe in my strength in using them ;-)) I use mists really often, and so my sample for our latest challenge at Craft4You was not that difficult :-)
Wyzwanie wymaga użycia przynajmniej jednej mgiełki tak, by była widoczna. Ja użyłam w sumie trzech: złotą Heirloom Gold spryskałam arkusz bazowy, miętową Mint na środkowy arkusz, a czarną Black Marble naniosłam przy pomocy maski wzór damaska na papier bezpośrednio pod zdjęciem. Najlepiej widać to tu:
The challenge requires using at least one mist so that it's visible in the creation. I used three: sprayed the golden Heirloom Gold onto the background paper, the mint Mint one onto the matting sheet and using a stencil and the Black Marble mist I added the damask pattern onto the paper directly under the photo. It's best visible here:
Dwie pierwsze mgiełki pochodzą z serii Perfect Pearls, a czarna z serii Dylusions. O ile mgiełki z kolekcji Perfect Pearls mają bardzo subtelne kolory, dając głównie połyskującą powierzchnię (mgiełka Heirloom Gold jest tu wyjątkiem, jest dość mocno kryjąca i metaliczna), tak mgiełki z serii Dylusions nie mają połysku, za to są mocno pigmentowe, jak farba w płynie. Weźcie to pod uwagę, dokonując wyboru w sklepie :-)
The first two mists come from the Perfect Pearls series, and the black one from the Dylusions collection. And while Perfect Pearls have very subtle colours and add a shiny surface (the Heirloom Gold is exceptional, being quite opaqu and metallic), the Dylusions mists aren't glimmery, but they are heavile pigmented, like liquid paints. Take tht into account while shopping :-)
A wracając do LO:
And back to the LO:
Na kwiatach, które nie pasowały mi kolorystycznie, dobrze widać metaliczny efekt Heirloom Gold:
You can see the Heirloom Gold metallic effect on the flowers that didn't match the colour palette:
Podlinkowane materiał znajdziecie w moim poście na blogu C4Y.
You can find linked supplies in my post on the C4Y blog.
***
A jeśli podobają się Wam moje scrapy i chcielibyście mieć jeden, wykonany specjalnie dla Was, a przy tym wspomóc leczenie synka naszej koleżanki Vairatki - zalicytujcie w aukcji na rzecz Stasia :-) Dla zwycięzcy aukcji zrobię layout z dostarczonym zdjęciem i według uzgodnionych szczegółów. Pamiętajcie - im wyższą cenę osiągnie layout, tym większą szansę ma Staś, by uczestniczyć w rehabilitacji.
Etykiety:
Craft4You,
LO 30x30,
Prima,
projektuję / DT work,
Rodzinne / Family
wtorek, 26 sierpnia 2014
Flowery Shadowbox / Ukwiecony shadowbox
Piękne papiery Maja Design i kwiaty od Flora Belli połączyły siły na niewielkim shadowbox'ie ze zdjęciami moich chłopaków :-)
Beautiful Maja Design papers and flowers from Flora Bella combined forces in this small shadowbox with my boys' photos :-)
A teraz proponuję przerwę na kawę, bo zdjęć jest sporo ;-))
And now I suggest taking a coffee break as there are many photos ;-))
Przed sklejeniem shadowboxa (baza ze Scrapińca) okleiłam ścianki i boki papierami, które potuszowałam i postarzyłam. A potem sama przyjemność ozdabiania :-)
Before assembling the shadowbox (the chipboard base by Scrapiniec), I covered all walls and sides with inked and distressed papers. And then the embellishing fun began :-)
W buteleczce jest list do chłopaków - nie jest zamknięta, więc mogą go sobie w dowolnej chwili wyjąć i przeczytać (co Filip zresztą robi co chwilę ;-))
The glass bottle contains my letter to boys - it's not sealed so they can take it out and read any time (what Filip actually does every ten minutes ;-))
I kolejne elementy:
Some more embellies:
Szczyt shadowbox'a zdobią kwiaty:
Flowers decorate the top of the shadowbox:
A liczby z tyłu oznaczają wiek chłopaków w momencie zrobienia fotek :-)
The numbers designate the boys' age at the time of taking the photos :-)
Jak na dość mały przedmiot (15x15 cm), to całkiem sporo pomieścił on mgiełek, farb, brokatu, stempli i innych bardziej widocznych ozdób ;-) Listę materiałów znajdziecie na blogu Maja Design i Flora Bella.
As for such a small object (15x15 cm), it contains quite a lot of mists, paints, glitter and stamps, apart from the more visible embellies ;-) You will find the list of supplies on the Maja Design and Flora Bella blogs.
Miłego dnia! :-)
Have a nice day! :-)
Etykiety:
altered,
Flora Bella,
Maja Design,
projektuję / DT work,
Rodzinne / Family,
shadowbox
środa, 20 sierpnia 2014
Wspomnienia podróżnika w czasie / Time Traveler's Memories
Tym razem na mój post dla Craft4You stworzyłam dwie kartki, bazując na kolekcji Time Traveler's Memories od Primy:
For my post for Craft4You I made two cards using the Time Traveler's Memories collection by Prima:
Dzięki gotowym tłom i elementom z arkusza Love Affair kartki powstały niemal błyskawicznie ;-)) (to znaczy zajęło mi to jakąś godzinę ;-)) Są warstwy i przestrzenność:
Thanks to ready-printed postcard backgrounds and elements from the Love Affair sheet I made them in a blink of the eye (which is about an hour ;-)) There are layers and dimension:
...dużo kwiatów i odrobina blasku:
...lots of flowers and a touch of glimmer:
Szczegóły znajdziecie na blogu C4Y :-)
Linked supplies are on the C4Y blog :-)
sobota, 16 sierpnia 2014
Home Sweet Home
Dzisiaj kartka dla Rodzinki, która niedawno wprowadziła się do wymarzonego domku :-)
Today a card for the Family who's recently moved into their dream home :-)
Kompozycja bardzo prosta, ale dużo uwagi poświęciłam detalom :-) (Nie wspominając już o tym, ile zajęło mi wybranie papierów!) Słodkie kwiatuszki z FloraBelli:
The design is quite simple, but I spent a lot of time on the details :-) (Not to mention how time it took me just to pick papers!) The sweet flowers are from FloraBella:
Domek i napis to stemple, które poddałam częściowemu procesowi paper-piecing:
The house and the sentiment are stamps that I partially paper-pieced:
Oczywiście, nie obyło się bez kolorowania - tym razem Promarkerami. "Trawa" zaś to gaza barwiona glimmer mist:
Of course there's some colouring - this time with Promarkers. The "grass" is cheesecloth coloured with a glimmer mist:
No i wyszło dość przestrzennie, warstw jest sporo ;-)
And it turned out quite dimensional, there are a lot of layers ;-)
Miłego weekendu!
Have a nice weekend!
środa, 13 sierpnia 2014
Notes shabby chic SB - z kursem :) / SB Shabby Chic Notebook - With Tutorial
Tak się złożyło, że i dzisiaj mam dla Was kurs :-) Tym razem przygotowałam romantyczny notes w stylu shabby chic z produktów od ScrapBerry's:
It so happens I have another tutorial for you :-) This time I made a romantic shabby chic notebook using products I got from ScrapBerry's:
A jak go zrobiłam? Zaczęłam od oklejenia brzegów tekturek na okładki taśmą washi The Eiffel Tower - choć taśma jest delikatna, świetnie sprawdza się jako zabezpieczenie brzegów przed brudem i uszkodzeniem:
How did I make it? I started by wrapping hte edges of the chipboard covers with The Eiffel Tower washi tape - even though washi is delicate, it's great for securing edges against dirt and damage:
Następnie przycięłam papiery z kolekcji Rose Garden - po trzy panele na zewnętrzne okładki, po jednym na wewnętrzne:
Then I trimmed papers from the Rose Garden collection - I used three panels for outer covers and one for the insides:
Potem ozdobiłam nieco arkusze: odbiłam stempel z zestawu French Journey (1), przy pomocy masek i pasty strukturalnej dodałam wzory przestrzenne (2), a ponieważ były byt mało widoczne (3), podkolorowałam je farbą akrylową (4):
Then I decorated the panels a bit: I stamped an image from the French Journey set (1), added some dimensional patterns using stencils and texture paste (2), and as they weren't visible well enough (3), I added a bit of colour with acrylic paint (4):
Gdy media wyschły, potuszowałam i postarzyłam wszystkie brzegi:
When media were dry, I inked and distressed all the edges:
Ponieważ nie planowałam więcej ozdób na tylnej okładce, skleiłam wszystkie panele. Potem skleiłam też panele zewnętrzne frontowej okładki, dodając kawałek koronki:
I didn't plan to embellish the back cover any more, so I glued the panels on both sides. Then I glued the panels on the outside of the front cover, adding a piece of lace across the smallest panel:
Następnie dodałam na tak przygotowanym tle kilka ozdób: mocowane ćwiekami zegar French Journey, plakietkę Wind of Travel 3 (1), ćwiek z zestawu Mechanical Illusions i ornament z masy Versailles (2) - kiedy już wszystkie ćwieki są umocowane, można przykleić wewnętrzną okładkę (3) - a potem jeszcze kilka kamyczków Versailles i kwiatów z masy Chrysanthemums Versailles (4):
Then I added a couple of embellies on that background: brad-attached clock French Journey, a Wind of Travel 3 plaquette (1), a brad from the Mechaical Illusions set and a resin ornament Versailles (2) - when all the brads are secured, you can glue the inner cover (3) - and then some more Versailles gems and Versailles Chrysanthemums (4):
Teraz można już zbindować notes i dokończyć zdobienie: przykleiłam przetarty białym gesso kwiat:
Now you can bind your notebook and finish the project: I glued the flower that I brushed over with white gesso:
I na koniec przewiązałam gniecioną wstążeczkę Light Pink i Tiffany, dodałam kawałki taśmy washi i kilka pociągnięć niemal suchego pędzla z białą farbą. Gotowe :-)
Finally I tied the Light Pink and Tiffany shabby ribbon, added some pieces of washi tape and a few strokes of a nearly-dry brush with white paint. Done :-)
Etykiety:
kursy / tutorials,
notes / notebook,
ScrapBerry's
wtorek, 12 sierpnia 2014
Sto lat! - z kursem :) / Happy Birthday! - With Tutorial
W moim dzisiejszym poście dla Maja Design pokazałam torebkę, w której w zeszłym tygodniu wręczyliśmy urodzinowe prezenty mojemu mężowi:
In my today's post for Maja Design I shared the bag in which we gave my husband his birthdya presents last week:
Nie jest to jednak tylko udekorowana papierowa torebka ;-))
But it's not just a decorated paper bag ;-))
Tag jest wysuwany, i służy jako kartka urodzinowa z życzeniami :-)
The tag is removable and serves as the birthday card with wishes :-)
A jeśli chcielibyście zrobić podobny zestaw - oto mały kursik: najpierw docięłam papiery (1), potem na najmniejszych panelach odbiłam ten sam stempel TH w różnych rozmiarach (2), dodałam trochę tekstury (3) i potuszowałam i postarzyłam brzegi wszystkich paneli (4):
If you would like to create a similar set, here's a tutorial for you: first I trimmed the papers (1), then stamped the same image by TH in two sizes (2), added some texture pattern (3) and inked and distressed all edges of the panels:
Najpierw zajęłam się tagiem :-) Chcąc zlokalizować miejsce na kółeczko wzmacniające, skleiłam wszystkie panele i ułożyłam je na bazie (1), odwróciłam i wycięłam dziurkaczem otwór (2). Następnie przykleiłam kółeczko (3) :-) Na koniec ozdobiłam tag tak, by w dolnej jego części nie było żadnych wystających elementów, w przeciwnym razie tag nie wysuwał się gładko (4):
I worked on the tag first. I needed to locate the place for the paper washer, so I layered all the tag panels and placed them over the tag base (1), turned it over and punched through the visible hole (2). Then I attached the washer over the hole (3) :-) Finally I decorated the tag so that there weren’t any elements sticking out in the lower part – otherwise the tag might not slide in and out easily (4):
Następnie zajęłam się dekoracją na torebkę. Skleiłam dwa mniejsze panele i zaczęłam je ozdabiać (1). Ułożyłam trzy kawiaty w zagiętą linię (2), tak, by kwiat na tagu znalazł się pomiędzy nimi, gdy będzie wsunięty (3). A czemu nie skleiłam od razu wszystkich paneli? Bo największy będzie miał kontakt z tagiem i nie chciałam, żeby wsuwanie zakłócały łodyżki kwiatów czy nóżki ćwieka :-) (4):
Then I went on to work on the bag panel. I layered two smaller panels and started decorating them (1). I arranged three flowers in a U-shape line (2), so that the flower from the tag goes in the middle when the tag slided in (3). Why I didn’t layer the largest panel yet? Because it would come into contact with the tag and I didn’t want the flower stems or the brad arms to hinder the tag sliding (4).
Kiedy front ozdoby był już gotowy, dokleiłam największy panel i oto miałam już dwa elementy dekoracji, pasujące do siebie kolorami i stylem :-)
When I finished decorating the front of the bag panel, I layered the largest panel and had two elements of the bag decor matching in colours and style:-)
Pozostało tylko umieścić je na torebce. Złożyłam tag i panel na torebkę razem tak, by kompozycje kwiatowe pasowały do siebie i trzymając je razem, odwróciłam. Następnie przy pomocy taśmy piankowej przygotowałam rodzaj tunelu-prowadnicy dla taga:
Now I just needed to attach the decoration to the bag. I placed the tag under the bag panel so that the flower clusters matched, and holding the two pieces together, I turned them over. Then using the foam tape I formed a kind of sliding guide for the tag, like so:
I gotowe :-)
And that's all :-)
Pamiętacie o candy z Maja Design? Zapraszam :-)
Do you remember about my candy with Maja Design? Join in :-) Miłego dnia!
Have a nice day!
In my today's post for Maja Design I shared the bag in which we gave my husband his birthdya presents last week:
Nie jest to jednak tylko udekorowana papierowa torebka ;-))
But it's not just a decorated paper bag ;-))
Tag jest wysuwany, i służy jako kartka urodzinowa z życzeniami :-)
The tag is removable and serves as the birthday card with wishes :-)
A jeśli chcielibyście zrobić podobny zestaw - oto mały kursik: najpierw docięłam papiery (1), potem na najmniejszych panelach odbiłam ten sam stempel TH w różnych rozmiarach (2), dodałam trochę tekstury (3) i potuszowałam i postarzyłam brzegi wszystkich paneli (4):
If you would like to create a similar set, here's a tutorial for you: first I trimmed the papers (1), then stamped the same image by TH in two sizes (2), added some texture pattern (3) and inked and distressed all edges of the panels:
Najpierw zajęłam się tagiem :-) Chcąc zlokalizować miejsce na kółeczko wzmacniające, skleiłam wszystkie panele i ułożyłam je na bazie (1), odwróciłam i wycięłam dziurkaczem otwór (2). Następnie przykleiłam kółeczko (3) :-) Na koniec ozdobiłam tag tak, by w dolnej jego części nie było żadnych wystających elementów, w przeciwnym razie tag nie wysuwał się gładko (4):
I worked on the tag first. I needed to locate the place for the paper washer, so I layered all the tag panels and placed them over the tag base (1), turned it over and punched through the visible hole (2). Then I attached the washer over the hole (3) :-) Finally I decorated the tag so that there weren’t any elements sticking out in the lower part – otherwise the tag might not slide in and out easily (4):
Then I went on to work on the bag panel. I layered two smaller panels and started decorating them (1). I arranged three flowers in a U-shape line (2), so that the flower from the tag goes in the middle when the tag slided in (3). Why I didn’t layer the largest panel yet? Because it would come into contact with the tag and I didn’t want the flower stems or the brad arms to hinder the tag sliding (4).
Kiedy front ozdoby był już gotowy, dokleiłam największy panel i oto miałam już dwa elementy dekoracji, pasujące do siebie kolorami i stylem :-)
When I finished decorating the front of the bag panel, I layered the largest panel and had two elements of the bag decor matching in colours and style:-)
Pozostało tylko umieścić je na torebce. Złożyłam tag i panel na torebkę razem tak, by kompozycje kwiatowe pasowały do siebie i trzymając je razem, odwróciłam. Następnie przy pomocy taśmy piankowej przygotowałam rodzaj tunelu-prowadnicy dla taga:
Now I just needed to attach the decoration to the bag. I placed the tag under the bag panel so that the flower clusters matched, and holding the two pieces together, I turned them over. Then using the foam tape I formed a kind of sliding guide for the tag, like so:
I gotowe :-)
And that's all :-)
Pamiętacie o candy z Maja Design? Zapraszam :-)
Do you remember about my candy with Maja Design? Join in :-) Miłego dnia!
Have a nice day!
Subskrybuj:
Komentarze (Atom)


