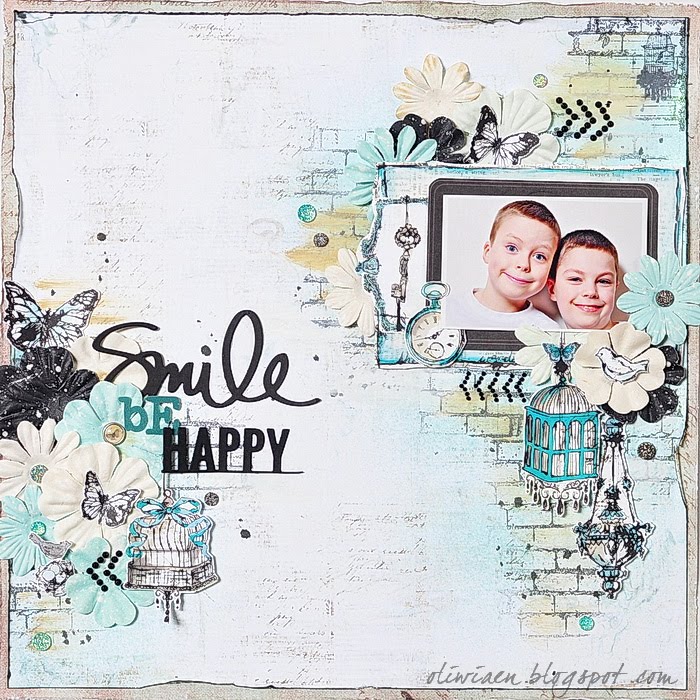
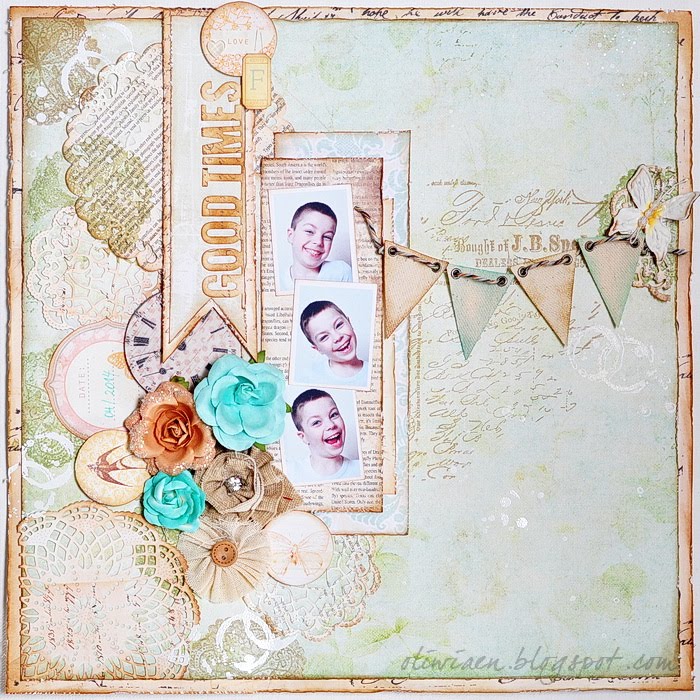
W zeszłym roku nie udało mi się dotrzymać tego postanowienia - kolejne więc podejście ;-) Rzutem na taśmę - ale lepiej późno niż wcale, prawda? - LO do styczniowej mapki Primy:
Last year I didn't manage to keep this resolution - and so I'm trying again this year ;-) At the last moment - but better late than never, right? - my take on the Prima January BAP sketch:
Mapkę odtwarzałam z pamięci - i jak widać szwankuje ona mocno, bo nie jest to wierna realizacja, tak jak lubię. No cóż, starość nie radość ;-)
I realised the sketch off the top of my head and clearly my memory is failing me as it's not a faithful representation, as I like. Well, age is a heavy burden ;-)
Journaling u mnie to wyrazy naniesione przy pomocy gesso i maski na inną maskę, tym razem tuszowaną:
I made my journaling by applying gesso to words from a stencil upon another stencil pattern, this time an inked one:
Zdjęcia zaś otoczyłam kompozycją kwiatową z dodatkiem elementów metalowych, drewnianych, kryształków i wycinanki z wykrojnika:
I decorated my photos with a flower cluster to which I added some metal and wooden elements, crystals and a die cut:
Rzut oka na smakowitą przestrzenność ;-) - nie ma mowy, by takie layouty upchnąć w albumie, więc przechowuję je teraz w pudełku...
Take a look at this yummy dimension ;-) - there's no way to squeeze such layouts into an album, so now I'm storing them in a box...
Miłego dnia!
Have a nice day!
niedziela, 31 stycznia 2016
środa, 27 stycznia 2016
Love Is All You Need
Przyjęło się chyba już, że w lutym szczególną uwagę kierujemy na uczucia ;-) A spośród całej ich gamy, którą dane jest doświadczać człowiekowi, to jedno jest wyjątkowe. Ma
różne oblicza i wiele rodzajów, może być trudna, bolesna, piękna,
dodająca skrzydeł - ale jedno jest pewne, bez niej ani rusz. Miłość jest
wszystkim. I o tym właśnie przypomina kartka, którą przygotowałam na mój dzisiejszy post dla Lemonade:
It's been a while since we pay special attention to feelings in February ;-) And among the whole range that man can experience, this one is special. It has many faces and kids, can be hard, painful, beautiful and giving you wings to fly - but it's sure you just can't do without it. Love is everything. And the card I created for my today's post for Lemonade reminds us of the fact:
Połączyłam róże i fiolety z kolekcji Victorian Garden z brązem z kolekcji This Is A Man's World, a na tym tle umieściłam filigranowe zawijasy tekturkowe, kwiaty wycięte z arkusza i te przestrzenne oraz kryształki:
I combined pinks and lilacs of the Victorian Garden collection with the browns of the This Is A Man's World collection and on that background I arranged filigree chipboard flourishes, flowers cut out from one of the papers and the dimensional ones and some crystals:
Sam zaś cytat podkleiłam papierem w paseczki (jeden z moich ulubionych wzorów obok arkusza z różami! :-)) i obwiązałam sznureczkiem z pięknym ozdobnym serduszkiem:
I matted the quotation with the striped paper (it's one of my favourite designs, right after the roses papers! :-)) and tied around a piece of string with a beautiful decorative heart charm:
Taka kartka może z powodzeniem pełnić rolę walentynki :-)
I think such card can make a great Valentine's card :-)
poniedziałek, 25 stycznia 2016
Kochany pamiętniku... / Dear Diary...
Jako dziewczynka nie pisałam co prawda pamiętnika, ale zeszyt na różne "sekrety" był obowiązkowo, inny w każdej klasie ;-) Sama więc idea zapisywania ważnych wspomnień nie jest mi obca, a że teraz realizuję ją bardziej plastycznie niż pisemnie, to z wielką przyjemnością zrobiłam ten oto mały pamiętniczek:
As a little girl I didn't write a diary, but I had a special notebook for various "secrets" - it was a must during my schooldays and it had to be different in every grade ;-) And so the idea of writing down important moments isn't new to me, and as I realise it now in a more visual than writing way, I made this little diary with great pleasure:
Jak zawsze, najpierw wzmocniłam brzegi okładek taśmą washi - i choć ta brokatowa ma beznadziejny klej i odchodzi już po minucie, to jednak "ujarzmiona" naklejonym papierem spełnia swoją funkcję wzmacniająco-lśniącą ;-) bardzo dobrze :-))
As always, I first strenghtened the edges of the covers with washi tape - and though the glitter gold one I chose has terribly weak glue on it and comes off after seconds, when I secured it with papers of the background it does the job of a glistening trim very well :-))
Sówka na sprężynie - nieprzypadkowo ;-)
The owl on the wire - not a coincidence ;-)
Okładkę zdobi siedząca Tilda, jak zwykle kolorowana Distressami:
I decorated the cover with a sitting Tilda, coloured, as always, with Distress inks:
Pamiętnik miał być w turkusach i fioletach, a te wymagania idealnie spełnia kolekcja Watercolour My World od Lemonade:
The diary was supposed to be turqouise and purple, and the Watercolour My World collection by Lemonade perfectly fulfills the requirements:
Właścicielka może tu wpisać własny tytuł, hasło czy też cokolwiek innego ;-) I tu sówka do kompletu, którą odbiłam na kartonie, wycięłam i pozostawiłam do pokolorowania :-)
The owner can write here her own title for the diary, a password, or anything else she likes ;-) And here's another owl, this one I stamped and cut out and left to be coloured :-)
Na końcu pamiętnika kolejna kolorowanka - ta sama Tilda, co na okładce, może właścicielka będzie miała na nią inny pomysł ;-)
At the end of the diary I included the same Tilda image as on the cover - perhaps the owner would have a different colouring idea ;-)
Mam nadzieję, że pamiętnik będzie zawierał same miłe wspomnienia!
I hope the diary would contain only the good memories!
sobota, 23 stycznia 2016
Dla niej i dla niego / For Him and For Her
Na mój dzisiejszy post dla the ScrapBerry's przygotowałam dwie kartki z tej samej kolekcji - Photo Archive - i dodatkami z kilku innych.
For my today's post for the ScrapBerry's I created these two cards using the same collection - Photo Archive - and embellishments from several other collections.
Na pierwszy rzut oka Photo Archive to raczej męska kolekcja, ale ma kilka wzorów, które podsunęły mi pomysł na wersję "kobiecą" ;-)
At the first sight Photo Archive is a rather masculine collection, but it does feature a couple of motives that gave me an idea for a "feminine" card ;-)
Kwiatowe dodatki i słodka babeczka (te szczegóły!) dały efekt romantycznej delikatności:
Flowery embellishments and this sweet cupcake (just look at those details!) resulted in a romantic delicacy:
W kartce męskiej postawiłam na elementy i przestrzenność:
The masculine card is about cut-out elements and dimension:
Do dekoracji, oprócz ćwieków, wstążki i kamyczków, wykorzystałam też tekturki po strzałkach - kształt wyjętych elementów podkreśliłam brokatem:
Apart from brads, ribbon and gems I decorated the card with chipboard leftovers - I accented the shape of removed arrows with glitter:
Spis materiałów znajdziecie na blogu the ScrapBerry's - większość z nich kupicie również w Polsce :-)
You can find the list of supplies on the ScrapBerry's blog - most of them are available in Poland too :-)
środa, 20 stycznia 2016
Czas ucieka / Time Flies
Ilu z Was na początku miesiąca zadało sobie pytanie: "2016?! A gdzie się podział 2015?!" Ja na pewno, wiele razy! A zwłaszcza, kiedy ostatnio porządkowałam foldery ze zdjęciami. Na zdjęciach właśnie najlepiej widać ten szalony upływ czasu... Wtedy pomyślałam o kolekcji Vintage Autumn Basics, w której czas jest motywem przewodnim. I tak powstał mój layout o mijającym czasie na mój dzisiejszy post dla Maja Design:
How many of you have asked yourselves at the beginning of the month: "2016?! Where has the 2015 gone already?!" I surely have, and many times! Especially when I was organising my photo folders the other day. Photos best prove the crazy speed of time passing... Then I thought of the Vintage Autumn Basics collection in which time is the main motif. And so I created this layout about time passing for my today's post for Maja Design:
Na arkuszu tła ułożyłam skrawki papieru - dzięki postarzeniu brzegów uzyskałam lekką przestrzenność:
On the background sheet I aranged scraps of papers - with distressing the edges I got a slight dimension too:
Na tej kompozycji umieściłam dwa zdjęcia mojego synka - z 2014 i 2015 - nie do wiary, jaka zmiana w ciągu jednego roku!
On the scraps composition I placed two photos of my son - from 2014 and 2015 - I still can't believe how much he changed over just one year!
Kompozycję uzupełniłam kilkoma kwiatami i wyciętymi z arkusza tarczami zegarów:
I completed my design with a couple of flowers and cut-out clockfaces:
...i balonami, które umieściłam obok tych wydrukowanych na arkuszu. Wycięte elementy podkleiłam na piance 3D, co wzmocniło efekt perspektywy.
...and balloons that I placed by the ones pronted in the paper. I mounted those cut-out elements on 3D dots to enchance the perspective effect.
Spis materiałów znajdziecie oczywiście na blogu MD. Miłego dnia!
Of course, you will find the list of supplies on the MD blog. Have a nice day!
Etykiety:
Filip,
LO 30x30,
Maja Design,
projektuję / DT work
niedziela, 17 stycznia 2016
You Shine - Blue Fern Studios
I kolejny layout dla Blue Fern Studios - tym razem fantastyczna kolekcja Timeless i moje "świetliste" chłopaki ;-))
Here's another layout for Blue Fern Studios - this time the fantastic Timeless collection and my "shiny" boys ;-))
W tle odbiłam stemple z kilku zestawów:
I stamped several images on the background paper:
Wycięte z jednego z papierów vintage'owe etykiety ułożyłam pod zdjęciem:
I matted the photo with several vintage labels I cut out from one of the papers:
Tekturki ozdobiłam pudrami do embossingu (w tym moim ulubionym 14 Karat):
I covered the chipboard pieces with embossing powders (including my favourite 14 Karat):
Piękny industrialny border pokryłam zaś mieszanką kilku pudrów, która dała efekt spatynowanego, tkniętego rdzą metalu:
I covered the industrial part with a mixture of several colours ep to get the look of a patined rusty metal piece:
Poza tym dodałam kilka różyczek, oryginalną starą tarczę zegarkową i metalowy kluczyk:
Among my embellies are also mini roses, a genuine vintage watch face and a metal key charm:
Miłego dnia :-)
Have a nice day :-)
Etykiety:
Blue Fern Studios,
LO 30x30,
projektuję / DT work,
Rodzinne / Family
sobota, 16 stycznia 2016
We're All Mad Here - Blue Fern Studios
I oto nadszedł dzień mojego pierwszego postu dla Blue Fern Studios :-) Wcześniej miałam okazję pracować z ich produktami w ramach projektowania dla The Scrapbook Diaries, wiedziałam więc, że mogę się spodziewać pięknych tekturek, grubych papierów z niesamowitymi wzorami i cudownych vintage'owych stempli - i nie zawiodłam się! Jeden z layoutów już mieliście okazję zobaczyć przy okazji styczniowego wyzwania, a dzisiaj kolejny, z najnowszej kolekcji Blush:
And here it comes, my first DT post for Blue Fern Studios :-) I had a chance to work with their products while designing kits for The Scrapbook Diaries, and so I knew I could expect beautiful chipboard pieces, thick papers with gorgeous designs and fabulous vintage stamps - and I wasn't disappointed! You could have seen on of my layouts during the January sketch challenge reveal, and here's another one made using the latest collection, Blush:
LO swój początek ma w...tekturce tytułu ;-) Od razu pomyślałam o tych zdjęciach, a że skojarzyło mi się stylistycznie z Alicją w Krainie Czarów, to i powstała kompozycja z różnymi dziwnymi elementami ;-)) Każde słowo w tytułowej tekturce osobno pokrywałam tuszem do embossingu i innym kolorem pudru, by uzyskać wielobarwny efekt (przy okazji wypróbowałam fantastyczne pudry BFS!):
The LO originates from the...title chipboard ;-) I immediately thought of those photos, and as it reminded me of the Alice in Wonderland style, hence the design with verious weird elements ;-)) I started by covering each individual word of the title with embossing ink and then a different colour ep to get this multicolour effect (at the same time I had real fun playing with fantastic BFS eps!):
Z jednego z arkuszy wycięłam kwiatową ramkę, nałożyłam na drugi arkusz, i tak powstało tło:
I cut out the flowery frame out of one of the papers, layered it on another paper, and here's my background:
Jako dodatków użyłam stemplowanych motywów z różnych zestawów, które podkleiłam na piance 3D i ozdobiłam:
For my embellishments I used stamped images from various sets that I mounted on 3D dots and decorated:
Na blogu BFS znajdziecie szczegółowy spis użytych materiałów.
Miłego dnia :-)
You will find a detailed list of supplies on the BFS blog.
Have a nice day :-)
Etykiety:
Blue Fern Studios,
LO 30x30,
projektuję / DT work,
Rodzinne / Family
środa, 13 stycznia 2016
Czekoladownik dla Babci / Chocolate Box For Grandma
Jak może pamiętacie, na nasze styczniowe wyzwanie w Lemonade przygotowałam czekoladownik dla dziadzia. A na mój dzisiejszy post - wersję dla Babci :-)
As you may remember, my sample for the January challenge at Lemonade I created a chocolate box for grandpa. And today I have a version for grandma to share:
Tym razem połączyłam kolekcję Watercolour My World z elementami z kolekcji Victorian Garden i Vintage Basics:
This time I combined the Watercolour My World papers with elements from the Victorian Garden and Vintage Basics collections:
A wewnątrz, oczywiście, kieszonka na czekoladę i wkładka na wpisanie życzeń.
And inside, of course, there's a pocket for a chocolate bar and a cardstock piece for writing in wishes.
A na blogu Lemonade znajdziecie podlinkowane materiały. Miłego dnia :-)
You will find linked products on the Lemonade blog. Have a nice day :-)
niedziela, 10 stycznia 2016
Męska kartka - kurs dla Lemonade / A Masculine Card - A Tutorial For Lemonade
For my tutorial post for Lemonade I wanted to share something even beginners can easily follow :-) Using the papers, elements and stickers from the This Is A Man's World collection, I made this masculine card and presented step by step how to :-)
Potrzebne będą:
- kolekcja This is a man's world
- wybrany stempel z napisem
- sznureczek
- nożyczki
- klej i kosteczki 3D
- tusze do odbitek i tuszowania
- kilka perełek, kryształków bądź ćwieków do dekoracji.
You'll need:
- This is a man's world collection
- sentiment stamp of chocie
- a piece of string or ribbon
- scissors
- glue and 3D dots
- inks for stamping and inking
- a couple of pearls, crystals or brads for decoration
1. Z arkusza dodatków wycięłam wybrane elementy: 1. I cut out selected elements from the Elements sheet:
2. Wybrane papiery docięłam na wymiar: 13,5 x 13,5 cm, 13x13 cm oraz węższe paski, ok. 5x13 i 1x13 cm. Docięłam też kartonik pod obrazek z żaglówką tak, by powstała cienka ramka wokół obrazka.
2. I trimmed selected papers to get the sizes: 13,5 x 13,5 cm, 13x13 cm and two narrower stripes, ca. 5x13 cm and 1x13 cm. I also trimmed a piece of paper to mat the sail image, so that there's a thin frame around it.
3. Z tego samego papieru wycięłam dwa małe kwadraciki, które następnie rozcięłam wzdłuż przekątnej:
3. Using the same matting paper I cut out two small squares and then cut them along the diagonal.
4. Podkleiłam obrazek papierem, a trójkąciki nakleiłam w narożnikach, co dodatkowo podkreśla charakter vintage:
4. I matted the image and then attached the small triangles in corners, to additionally emphasise the vintage character:
5. Potuszowałam i postarzyłam brzegi papierów:
5. I inked and distressed the edges of papers:
6. Postarzyłam pozostałe wycięte elementy. Bok obrazka owinęłam sznureczkiem i przymocowałam do niego kotwicę. Sznureczek zawiązałam też na tagu:
6. I distressed also the other cut-out elements. I tied a piece of twine around ode side of the image and attached the paper anchor. I also tied a piece of twine to the tag:
6. Na wyciętym bileciku odbiłam napis:
6. I stamped the sentiment on the cut-out tag:
7. Z arkusza naklejek wybrałam słowo i podkleiłam go na kosteczkach 3D.
7. I selected a word from the stickers sheet and then mounted it on 3D dots.
8. Teraz pozostaje już złożenie elementów w całość :-) Ułożyłam papiery w warstwowe tło i dla urozmaicenia chlapnęłam tu i tam tuszem w płynie:
8. Now it's time to put the elements together :-) I layered my background and splashed here and there for more interest:
9. Poszczególne elementy podkleiłam kosteczkami i ułożyłam w kompozycję:
9. I mounted the elements on 3D dots and arranged them on the background:
10. Na koniec nakleiłam kompozycję na bazę i dodałam kilka kryształków:
10. Finally, I attached my composition onto a card base and added a couple of crystals:
Spis podlinkowanych materiałów znajdziecie na blogu Lemonade :-)
You will find linked supplies on the Lemonade blog :-)
Subskrybuj:
Komentarze (Atom)


