skip to main |
skip to sidebar
W moim dzisiejszym poście dla Lemoncraft pokazałam urodzinowy pop-up box dla pewnego uroczego roczniaka :-)
In my today's post for Lemoncraft I shared a birthday pop-up box for a certain cute one-year-old :-)
Przyznam, że kartki typu pop-up box podobały mi się od dawna -
idealne połączenie przestrzennej formy z możliwością włożenia do
płaskiej koperty :-) Jednak dopiero niedawno po raz pierwszy spróbowałam
ją wykonać. I okazało się, że nie jest to takie trudne, a żeby i Was o
tym przekonać, przygotowałam krótki kurs krok po kroku. Uprzedzam, będzie raczej długo ;-) ale mam nadzieję, że się Wam spodoba:
I must
say I liked the pop-up box cards for a long time - a perfect combination
of a dimensional form with the possibility of putting into a flat
envelope to mail :-) Yet it hasn't been until recently I decided to make
one myself. And it turned out to be easier than I thought, and to
convince you too I made this easy step-by-step tutorial. Now I must warn you it's going to be longish ;-) but I do hope you'd like it:
Sekretem
tej kartki jest baza, którą trzeba przygotować zwracając szczególną
uwagę na zachowanie równych 4 segmentów ;-) Cała reszta, łącznie z
wymiarami, to kwestia Waszej wyobraźni. I tak moja kartka ma wymiary ok.
13x17 cm, ale równie dobrze możecie zmienić te proporcje.
The
secret of the card is the base that needs your careful attention to make
four same segments ;-) The rest, the measurements including, depends on
your imagination. And so, my card measures ca. 13x17 cm, but you could
easily change the proportion.
Najpierw docięłam
karton kraft na wysokość 17 cm, a potem zbigowałam tak, by powstały 4
równe segmenty (w tym przypadku szerokości ok. 6,5 cm), dodając
centymetrowy pasek, który pozwoli połączyć ścianki. Potem ustaliłam
wysokość górnej części, która będzie w formie odchylanych klapek - na
wysokości ok. 7 cm - ale UWAGA: bigować należy tylko 3 segmenty, czwarty
ma być tylną, niezginaną ścianką. Następnie docięłam dwa kawałki na
przegródki wewnątrz boxa. Muszą mieć szerokość pojedynczego segmentu i
wysokość DOLNEJ części boxa, plus dwa wąskie paski po bokach, dzięki
którym można przykleić je wewnątrz.
First I trimmed the kraft
cardstock and then scored four even segments (in my card they are 2,5''
ca. 6,5 cm wide) plus a 1 cm piece that will allow to join the sides.
Then I chose the upper part that will form the flaps to be at ca. 7 cm -
but NOTE: score across only 3 segments, the fourth one will make the
stiff back. Then I trimmed two pieces of cardstock to make dividers
inside the box. They need to be of one segment's width and the height of
the LOWER part of the box, plus two narrow stripes on both sides to
glue them inside.
Rozcięłam poszczególne klapki wzdłuż bigowanych linii (pamiętając o
odcięciu górnej połowy wąskiego paska, która nie będzie potrzebna):
I cut the flaps along the scored lines (remember to cut off the upper part of the narrow strip, it won't be needed):
Przygotowałam kawałki różnych papierów na poszczególne części boxa -
trzy ścianki wewnętrzne dolnej części boxa nie potrzebują ozdoby.
I
trimmed pieces of various papers for the box sides - three inside sides
of the lower part of hte box don't need to be decorated:
Dla urozmaicenia zaokrągliłam górne narożniki i okleiłam wszystkie zewnętrzne ścianki:
I rounded all the upper corners for more interest, and decorated all the outer sides:
Teraz można już skleić pudełko, a wąski pasek zamaskować papierem na tylnej ściance:
Now you can glue the box base together and mask the narrow strip with the piece on the back inner side:
Pora wkleić przegródki:
I glued in the dividers:
Przygotowałam ozdoby:
I prepared the embellies:
Dekorowanie zaczęłam od tylnej ścianki:
I started decorating the box from the back:
Stopniowo dodawałam elementy, sprawdzając, czy każdy jest widoczny:
I added more elements, making sure they are all visible:
...i czy pudełko swobodnie się składa:
...and whether the box folds flat easily:
Potem wystarczyło dodać ozdoby na wierzchu klapek i przewiązać box
wstążką. Dodałam też kieszonkę na tag z tyłu, by można było dopisać
kilka słów. Gotowe :-)
Then I just added some more embellies on
the flaps and tied the ribbon around the box. I also added a pocket on
the back to put in the wishes tag. Finished :-)
A na blogu Lemoncraft znajdziecie podlinkowane materiały. Miłego dnia :-)
You will find linked supplies on the Lemoncraft blog. Have a nice day :-)
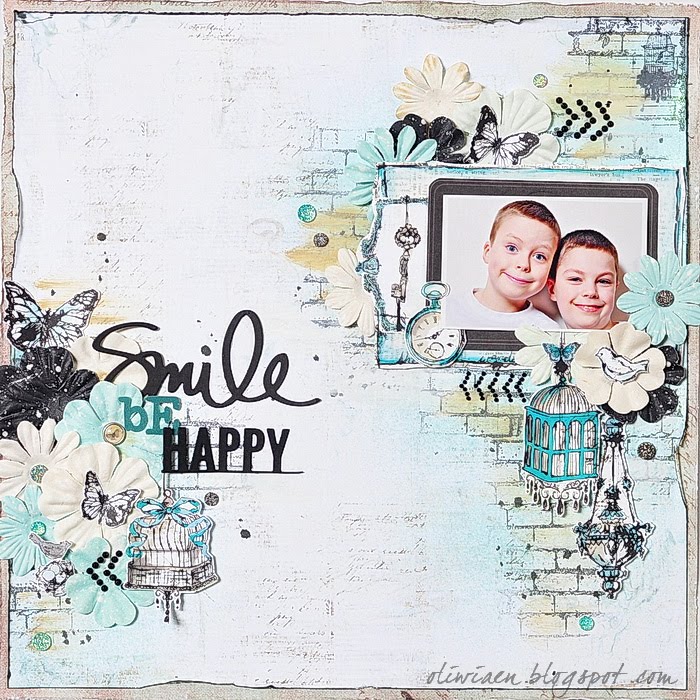
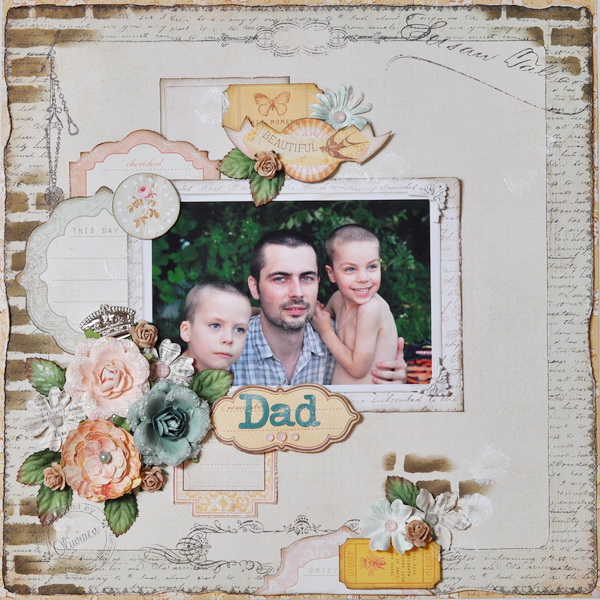
Kilka dni temu dotarła do mnie najnowsza kolekcja Maja Design, I Wish. Ponieważ nie lubię zaczynać tematyki Bożonarodzeniowej przed grudniem, a równocześnie zachwyciły mnie te papiery, postanowiłam je natychmiast wykorzystać, ale do zupełnie innego tematu :-) I w moim dzisiejszym poście przedstawiłam chłopięcy layout :-)
A couple of days ago I received the latest Maja Design collection, I Wish. As I don't like beginning the Christmas themes before December, but at the same time was delighted with the papers, I decided to use them immediately for a completely different theme :-) And so in my today's post I present this boy layout :-)
Każda kolekcja Maja Design może być wykorzystana uniwersalnie, bo tylne strony papierów to najczęściej neutralne wzory pasków, kratek i damasków. Na takich właśnie wzorach oparłam tło layoutu, a następnie dodałam ozdoby: tagi, tekturki, button i zawieszkę oraz oczywiście kwiaty :-)
Each of the Maja Design collections is quite universal, as the back sides of papers feature neutral patterns like stripes, plaids and damasks. And so I based the background on those patterns and then added embellishments: tags, chippies, a button and charm and of course flowers :-)
Taka różnorodność dodatków dobrze oddaje chłopca w wieku Filipa: już typowo chłopięce zainteresowania, a przy tym wciąż jeszcze mnóstwo dziecięcej delikatności i uroku :-)
Spis materiałów znajdziecie na blogu Maja Design. Miłego dnia :-)
Such variety of embellies really well reflects a boy of Filip's age: already typically boy interests and still a lot of baby charm :-)
You will find the list of supplies on the Maja Design blog. Have a nice day :-)
W moim poście dla The ScrapBerry's przedstawiłam tag, który "wystąpił" w Create and Craft TV reklamując kolejny kit :-)
In my post for The ScrapBerry's I presented a tag that appeared on Create and Craft TV as a sample for one of the new kits :-)
Wykorzystałam jedną z najnowszych kolekcji, A Furry Little Story, tworząc warstwową kompozycję z elementów wyciętych z poszczególnych papierów:
I used one of the latest collections, A Furry Little Story, and built a layered composition of elements I cut or die-cut from various papers:
Głównym motywem jest słodki kociak w filiżance :-)
The focal image is a sweet kitten in a teacup :-)
Napis na tagu to kombinacja wyciętego wykrojnikiem słowa i napisów na karcie journalingowej i buttonie. Dodałam też kwiaty wycięte wykrojnikiem z jednego z papierów:
The sentiment on the tag is a combination of a die-cut word and sentiments on the jounraling card and button. I also added handmade flowers die-cut from one of the papers:
Zajrzyjcie na bloga TSB po listę materiałów, a także pracę mojej koleżanki z DT, Lindy :-)
Visit the TSB blog for a list of supplies and a project of my DT friend Linda :-)
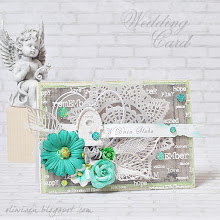
Na mój post dla Lemonade przygotowałam proste, delikatne kartki na powitanie maluszków:
For my post for Lemonade I created these simple and delicate welcome baby cards:
W obu kartkach użyłam uroczych stempelków - etykietek, i do ich stylistyki dopasowałam tekturowe buciki, odpowiednio dla dziewczynki i chłopczyka:
In both cards I used cute tag stamps and matched chipboard shoes in style for the boy and girl:
Kartki mają tę samą kompozycję i powstały z połączenia kolekcji Victorian Garden i Watercolour My World:
The cards have both the same design and were made using the Victorian Garden and Watercolour My World papers:
Stempelki będą uroczo wyglądać również w albumach czy ramkach :-) A na blogu Lemonade znajdziecie linki do wszystkich użytych produktów.
The stamps would look great in albums or frames too :-) Find linked supplies on the Lemonade blog.
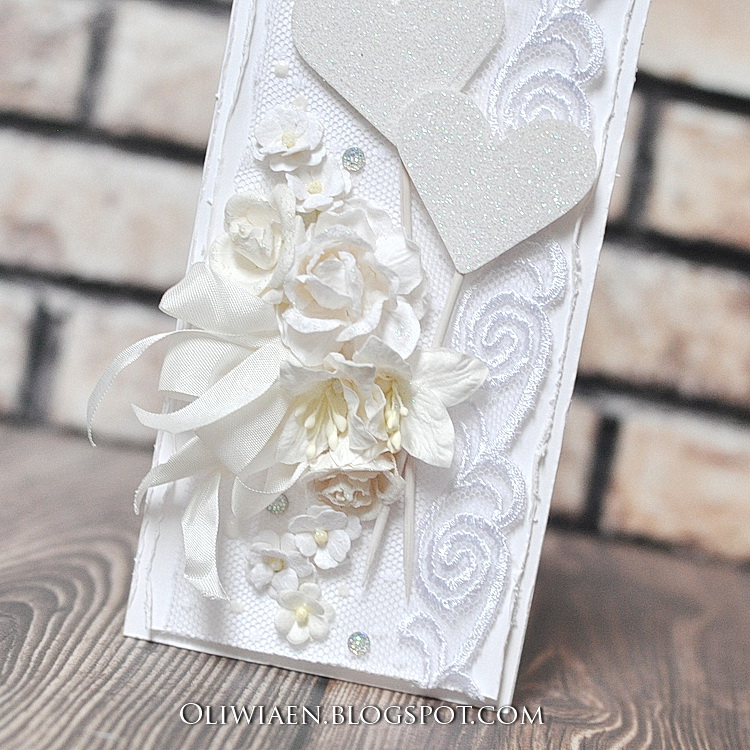
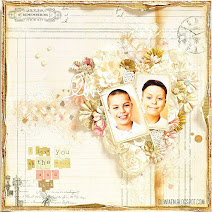
Specjalnie na dziś - kartka cała w bieli.
Especially for today - an all-white card.
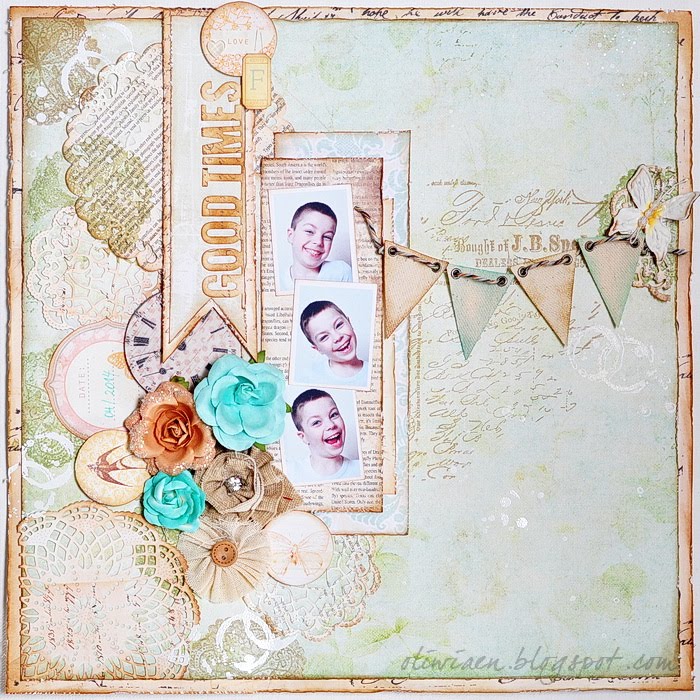
Z początkiem października ruszyło też wyzwanie w Lemonade - a że temat również jesienny (a dokładnie "Złota Jesień"), zrobiłam kolejną kartkę dla nauczycielki, i też z sową, ale tym razem to embossowany i kolorowany akwarelami stempel :-)
With the beginning of October a new challenge started at Lemonade too, and as the theme is also autumn ("Golden Autumn, to be precise), I made another card for a teacher, and also featuring the owl motif, but this time it's an embossed and watercoloured stamp :-)
Zdecydowałam się na paletę brązów i zieleni, z odrobiną żółtego:
I decided to use the brown and green palette with a touch of yellow:
...dodałam stemplowany cytat:
...I added a stamped quotation:
...a złote akcenty to puder do embossingu i liście wycięte w metalicznym złotym kartonie:
...and the required golden accents are the embossing powder and leaves I die-cut from gold metallic cardstock:
Zachęcam do udziału - nie ma obowiązku użycia produktów Lemonade, a można wygrać bon na zakupy!
I do encourage you to take part in the challenge - you don't have to use Lemonade products and you can still win a shopping coupon!
Początek miesiąca oznacza nowe wyzwania w kilku moich DT. W the ScrapBerry's październikowy temat to "Jesień". Nie jest to moja ulubiona pora roku, nie przepadam za jesienną paletą kolorystyczną z żółtym, czerwonym i pomarańczowym, więc było trochę trudniej, ale kartkę zrobiłam :-) Tematycznie - na jesienne święto nauczycieli.
The beginning of a month means new challenges in several of my DTs. "Autumn" is the October theme at the ScrapBerry's. It's not my favourite season nor is its palette of yellow, red and orange, so it was more difficult than usually, but I did make a card :-) It's for the Teacher's Day we celebrate in the middle of October.
Styl kartki też jakby nie "mój", ale zainspirowana kolekcją "Forest Friends", z której elementów powstała, postanowiłam spróbować czegoś nowego ;-)
The style of the card is not "mine" either, but inspired by the "Forest Friends" collection I used to make it, I decided to try something new ;-)
Na blogu znajdziecie świetne inspiracje od nowego DT :-) Miłego dnia!
Check out the new DT's samples on the blog :-) Have a nice day!
Hey, there's a new sketch challenge at Blue Fern Studios! Check it out here :-)