piątek, 28 października 2016

Always Sweet

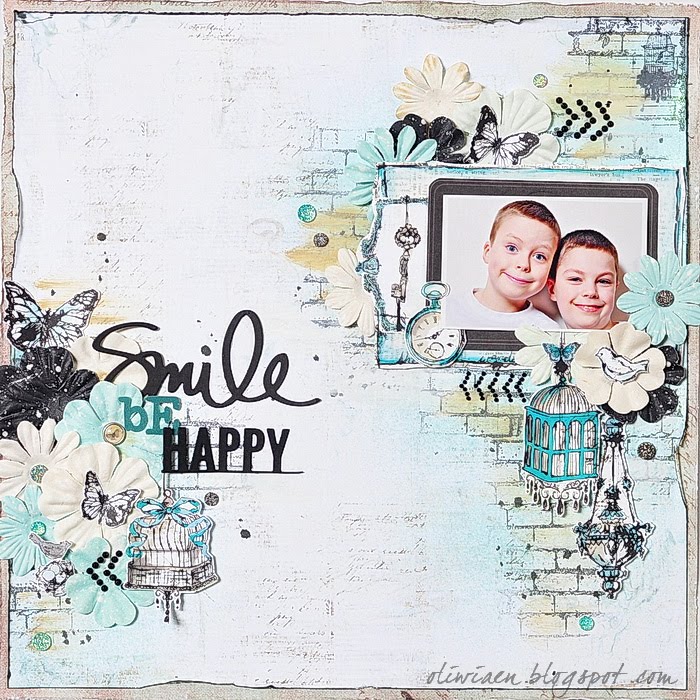
Kolejny, dziesiąty już layout do mapki Primy. Moje dziecko, moje kolory - co tu więcej mówić, obejrzyjcie:
Another layout following the Prima sketch - the tenth in a row. My son, my colours - well, words aren't necessary, just take a look:


Miłego dnia!
Have a nice day!

środa, 26 października 2016

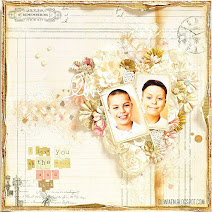
Love You

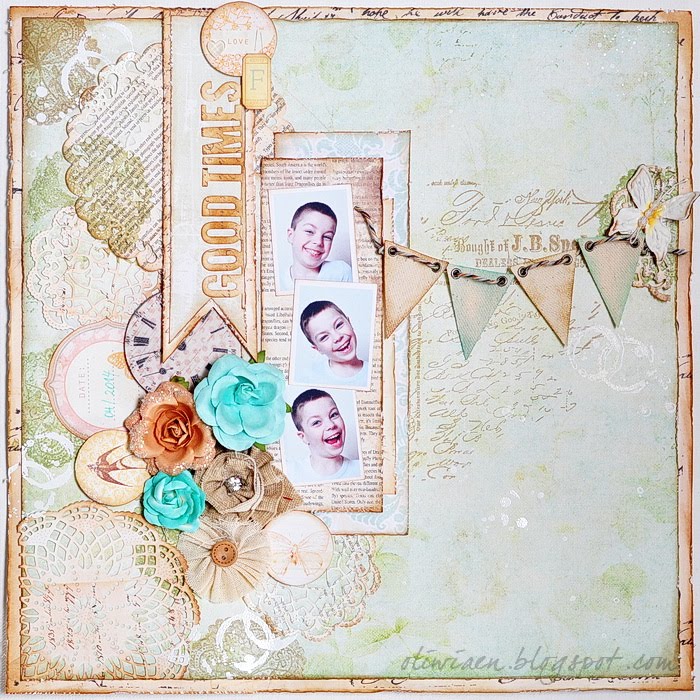
Świąteczna kolekcja Maja Design, I Wish, leży i czeka na świąteczne kartki, a zanim się za nie wezmę, postanowiłam powrócić na chwilę do wcześniejszej kolekcji, Vintage Romance, i przygotować layout w temacie - a jakże - miłosnym ;-)
The Christmas collection by Maja Design, I Wish, waits for this year's Christmas cards, and before I get down to making them, I decided to return to one of the older collections, Vintage Romance, and create a layout with - of course - a love theme ;-)


Choć kolekcja zaprojektowana jest do tematyki romansowo-ślubnej, świetnie sprawdzi się również w innych pracach, jak widać ;-) To właśnie lubię w papierach Maja Design - uniwersalność :-)
Although the collection has been designed for the romance and wedding themes, it is perfect for other themes as well, as you can see ;-) And that's what I like about Maja Design papers - universality :-)


Szczegóły materiałowe znajdziecie z moim dzisiejszym poście na blogu MD. Miłego dnia!
You can find the supply details in my today's post on the MD blog. Have a nice day!

niedziela, 23 października 2016

Pop-up box dla dziewczynki / A Pop-up Box Car For A Girl

Niedawno pokazywałam moją drugą kartkę typu pop-up dla chłopczyka - teraz czas na mój faktyczny debiut w tym temacie, czyli kartka, która powstała jakiś czas temu do kolejnego kitu the Scraperry's w Create&Craft TV :-)
Recently I shared my second pop-up card for a baby boy - now it's time to share my very first one of the kind, i.e. a pop-up I made some time ago as a sample for another kit by the ScrapBerry's on the Create&Craft TV show :-)


Kartka powstała z kolekcji stworzonej dla małych słodziaków - My Little Star :-)
The card was made using the collection created for lil sweeties  -My Little Star :-)


Kolekcja zawiera mnóstwo elementów do wycinania, łatwo więc było udekorować box:
The collection contains plenty of cut-out images so it was really easy do decorate the box:


Kolekcję My Little Star w wersji 12x12" i 6x6" kupicie w kilku sklepach w Polsce :-) Miłego dnia!
My Little Star is available in 12x12" and 6x6" sizes at several Polish stores :-) Have a nice day!

czwartek, 20 października 2016

Gdy kartka to za mało ;-) / When A Card Is Not Enough ;-)

Kilka dni temu obchodziliśmy Dzień Nauczyciela, i właśnie z tej okazji miałam wykonać nietypową kartkę na życzenia. Przedstawiłam ją w moim poście dla Lemonade, bo powstała z materiałów tej marki:
A couple of days ago we celebrated Teacher's Day and on that occasion I was to make an unusual card. I shared it in my post for Lemonade as I used their products to make it:


Formą kartka przypomina notes, którego okładki ozdobiłam stemplowanymi i embossowanymi na biało borderami:
The form of the card is like of a notepad, the covers of which I decorated with stamped and embossed in white borders:


Motyw borderów pojawia się również wewnątrz. Na życzenia przeznaczone jest kilka kartek, jest również strona na zdjęcie:
The border motif appears inside too. There are several paes for writing in wishes and a page for a photo:


Podlinkowane materiały znajdziecie na blogu Lemonade. Miłego dnia!
You will find linked supplies on the Lemonade blog. Have a nice day!

wtorek, 18 października 2016

Grateful For You - Blue Fern Studios

I kolej na ostatni z październikowych projektów dla Blue Fern Studios. Podobnie jak dwa poprzednie layouty, tak i ten powstał na tle "tylnej" strony papieru :-)
And now it's turn for the last of my October projects for Blue Fern Studios. Like the previous two, this one was also built upon a "back side" paper background :-)


Głęboka czerwień i damaskowy wzór tego arkusza od razu zwrócił moją uwagę :-) Nie chciałam go zbytnio zasłaniać, dlatego kompozycja jest bardzo oszczędna, jak na mnie to wręcz clean&simple ;-) W tle odbiłam kilka motywów:
That deep red colour and damask pattern of the paper atracted my attention right away :-) I didn't want to cover it too much, so the composition is quite simpple, or even clean&simple as for my style ;-) I stamped some motives in the background:


Zdjęcie umieściłam w przepięknej, delikatnej ramce embossowanej na biało i umieściłam na niej kontrastowy czarny tytuł:
I put my photo in the beautiful delicate frame embossed white and placed a contrastive black title upon it:


Pozostałe ozdoby to kwiaty, koronka, aniołek z masy i ozdobny napis:
The rest of the embellies include flowers, lace, a resin angel and decorative sign:


Dziękuję za wszystkie miłe słowa pozostawione przez Was ostatnio - i życzę miłego dnia!
Thank you so much for all the nice words you've left here recently - have a nice day!

poniedziałek, 17 października 2016

Back To School - Blue Fern Studios

A oto i drugi z październikowych layoutów dla Blue Fern Studios - tym razem temat szkolny :-)
Here's the second October layout I made for Blue Fern Studios - this time it's a school theme :-)


Jak zwykle, tekturki pokryłam pudrami do embossingu (w tym fantastycznym nowym Sand & Sea, którego użyłam na tytułowej tekturce). W tle odbiłam motyw cegiełek, dodałam kwiaty i kilka ozdób. Największym zaś wyzwaniem okazała się paleta kolorystyczna, którą zaadaptowałam do zdjęcia - nie pamiętam, czy kiedykolwiek użyłam tak mocnego pomarańczu i żółci ;-)
As usually, I covered the chippies with embossing powders (including the new fantastic Sand & Sea I used for the title piece). I stamped the bricks pattern in the background, added soem flowers and embellishments. But the greatest challenge was the colour palette I adapted from the photo - I don't remember whether I'd used such bold orange-yellow combo ever before ;-)


Spis użytych materiałów oczywiście znajdziecie na blogu BFS. Zaglądnijcie też jutro :-)
You will find the list of products on the BFS blog, of course. Do pop in tomorrow as well :-)

niedziela, 16 października 2016

Heaven Sent Blessings - Blue Fern Studios

Pora na comiesięczną dawkę inspiracji dla Blue Fern Studios :-) Na początek layout przygotowany na październikowe wyzwanie mapkowe:
Time to share my monthly isnpiration for Blue Fern Studios :-) Let me begin with the layout I made following the October sketch:


Layout powstał z poprzedniej kolekcji, Seasie Cottage. Urzekł mnie ten turkusowy papier! :-) Na tym tle pięknie prezentuje się biel i głęboka burgundowa czerwień, które tworzą paletę kolorystyczną layoutu. Na papierze ułożyłam kawałki "siatkowej" tekturki pomalowanej na biało gesso, a na niej słowa embossowane burgundowym pudrem:
I made the layout using the previous collection, Seaside Cottage. I really love the turqouise paper I used for the background! :-) It really makes the beautiful contrast against the white and deep burgundy red I added to the layout colour palette. I layered the chickenwire chipboard pieces painted white with gesso, and the word chippies embossed with ruby ep:


A jutro kolejna odsłona inspiracji dla Blue Fern Studios, zapraszam :-)
Tomorrow another Blue Fern Studios inspiration, do pop in :-)

piątek, 14 października 2016

Pop-up box na pierwsze urodzinki - kurs / First Birthday Pop-up Box w/Tutorial

W moim dzisiejszym poście dla Lemoncraft pokazałam urodzinowy pop-up box dla pewnego uroczego roczniaka :-) 
In my today's post for Lemoncraft I shared a birthday pop-up box for a certain cute one-year-old :-)


Przyznam, że kartki typu pop-up box podobały mi się od dawna - idealne połączenie przestrzennej formy z możliwością włożenia do płaskiej koperty :-) Jednak dopiero niedawno po raz pierwszy spróbowałam ją wykonać. I okazało się, że nie jest to takie trudne, a żeby i Was o tym przekonać, przygotowałam krótki kurs krok po kroku. Uprzedzam, będzie raczej długo ;-) ale mam nadzieję, że się Wam spodoba:
I must say I liked the pop-up box cards for a long time - a perfect combination of a dimensional form with the possibility of putting into a flat envelope to mail :-) Yet it hasn't been until recently I decided to make one myself. And it turned out to be easier than I thought, and to convince you too I made this easy step-by-step tutorial. Now I must warn you it's going to be longish ;-) but I do hope you'd like it:

Sekretem tej kartki jest baza, którą trzeba przygotować zwracając szczególną uwagę na zachowanie równych 4 segmentów ;-) Cała reszta, łącznie z wymiarami, to kwestia Waszej wyobraźni. I tak moja kartka ma wymiary ok. 13x17 cm, ale równie dobrze możecie zmienić te proporcje.
The secret of the card is the base that needs your careful attention to make four same segments ;-) The rest, the measurements including, depends on your imagination. And so, my card measures ca. 13x17 cm, but you could easily change the proportion.

Najpierw docięłam karton kraft na wysokość 17 cm, a potem zbigowałam tak, by powstały 4 równe segmenty (w tym przypadku szerokości ok. 6,5 cm), dodając centymetrowy pasek, który pozwoli połączyć ścianki. Potem ustaliłam wysokość górnej części, która będzie w formie odchylanych klapek - na wysokości ok. 7 cm - ale UWAGA: bigować należy tylko 3 segmenty, czwarty ma być tylną, niezginaną ścianką. Następnie docięłam dwa kawałki na przegródki wewnątrz boxa. Muszą mieć szerokość pojedynczego segmentu i wysokość DOLNEJ części boxa, plus dwa wąskie paski po bokach, dzięki którym można przykleić je wewnątrz.
First I trimmed the kraft cardstock and then scored four even segments (in my card they are 2,5'' ca. 6,5 cm wide) plus a 1 cm piece that will allow to join the sides. Then I chose the upper part that will form the flaps to be at ca. 7 cm - but NOTE: score across only 3 segments, the fourth one will make the stiff back. Then I trimmed two pieces of cardstock to make dividers inside the box. They need to be of one segment's width and the height of the LOWER part of the box, plus two narrow stripes on both sides to glue them inside.


Rozcięłam poszczególne klapki wzdłuż bigowanych linii (pamiętając o odcięciu górnej połowy wąskiego paska, która nie będzie potrzebna):
I cut the flaps along the scored lines (remember to cut off the upper part of the narrow strip, it won't be needed):


Przygotowałam kawałki różnych papierów na poszczególne części boxa - trzy ścianki wewnętrzne dolnej części boxa nie potrzebują ozdoby.
I trimmed pieces of various papers for the box sides - three inside sides of the lower part of hte box don't need to be decorated:


Dla urozmaicenia zaokrągliłam górne narożniki i okleiłam wszystkie zewnętrzne ścianki:
I rounded all the upper corners for more interest, and decorated all the outer sides:


Teraz można już skleić pudełko, a wąski pasek zamaskować papierem na tylnej ściance:
Now you can glue the box base together and mask the narrow strip with the piece on the back inner side:


Pora wkleić przegródki:
I glued in the dividers:


Przygotowałam ozdoby:
I prepared the embellies:

 
Dekorowanie zaczęłam od tylnej ścianki:
I started decorating the box from the back:


Stopniowo dodawałam elementy, sprawdzając, czy każdy jest widoczny:
I added more elements, making sure they are all visible:


...i czy pudełko swobodnie się składa:
...and whether the box folds flat easily:


Potem wystarczyło dodać ozdoby na wierzchu klapek i przewiązać box wstążką. Dodałam też kieszonkę na tag z tyłu, by można było dopisać kilka słów. Gotowe :-)
Then I just added some more embellies on the flaps and tied the ribbon around the box. I also added a pocket on the back to put in the wishes tag. Finished :-)


 A na blogu Lemoncraft znajdziecie podlinkowane materiały. Miłego dnia :-)
You will find linked supplies on the Lemoncraft blog. Have a nice day :-)