skip to main |
skip to sidebar
Najbardziej lubię robić mocno przestrzenne, bogate kartki - ale czasem trzeba zrobić taką, która zmieści się do koperty. Zrobiłam więc taką, która nie jest płaska, ale jeszcze wejdzie - choć nie było to proste ;-))
My favourite cards are rich and bulky - but sometimes you need to make one that will go into an envelope. And so I made one that is not flat, but will still fit an envelope - and that wa not easy for me ;-))
Postawiłam na niezawodne papiery Lemoncraft i delikatne dodatki: kryształowy ćwiek, mini różyczki, border z masy plastycznej i embossowany stempel. Dzięki temu, chociaż nie tak przestrzenna jak zwykle, kartka wciąż jest bogata w detale:
I chose the always trustworthy Lemoncraft papers and delicate embellishments: a crystal brad, mini roses, a mold border and heat-embossed stamp. And thus even though the card is not as dimensional as I usually make, it's still rich in details:
Miłego dnia :-)
Have a nice day :-)
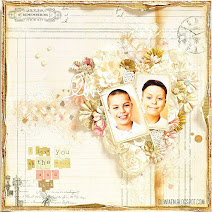
Na mój post dla Maja Design przygotowałam delikatną, romantyczną kartkę w stylu shabby chic:
For my next post for Maja Design I created a delicate, romantic shabby chic card:
Kartka powstała z jednej z moich najulubieńszych kolekcji Maja Design - Vintage Romance. Idea kompozycji jest bardzo prosta: piękny kwiatowy wzór papieru, dużo kwiatów przestrzennych i koronka :-)
I made the card using one of my most favourite Maja Design collections - Vintage Romance. The design idea is quite simple: beautiful flowery paper, lots of dimensional flowers and lace :-)
A żeby pokazać, jak jest łatwa w wykonaniu, przygotowałam kurs krok po kroku :-) Potrzebne materiały:
And to show you how easy it is to make I prepared this step-by-step tutorial :-) Here's what you're going to need:
Najpierw docięłam potrzebne kawałki papieru: spodni i środkowy papier różnią się wymiarami o 0,5 cm. Szerokość wierzchniego kawałka zależy od tego, jak duży kawałek koronki ma być spod niego widoczny. Potuszowałam, a potem postarzyłam wszystkie krawędzie:
I first trimmed three pieces of paper: the middle layer is 0,5 cm smaller from the bottom one. The width of the top piece depends on how much lace is to be visible from under it. I inked and then distressed all the edges:
Przykleiłam koronkę wzdłuż boków środkowego papieru, zawijając jej końce na tył i mocując je dwustronną taśmą:
I attached the lace along the sides of the middle paper, folding the ends over and attaching them with double-sided tape:
Skleiłam kolejno wszystkie warstwy:
I glued all the layers together:
Ułożyłam kompozycję kwiatową, zaczynając od środka i największych kwiatów, dodając mniejsze, na koniec dodałam pączki róż:
I arranged my flower cluster, starting from the middle of the card with largest flowers and adding smaller ones. I finished it off with rose buds:
Dodałam listki i tekturkowy napis:
I added leaves and a chipboard sentiment:
Zawiązałam kilka kokardek z woskowanego sznurka:
I tied a couple of bows from waxed string:
Każdą kokardkę złożyłam na pół, nałożyłam klej na węzeł i wetknęłam pomiędzy kwiaty :-)
I folded each bow into half, applied glue on the knot and tucked the bow in between the flowers :-)
Pozostało dodać kilka kropeczek perełkami w płynie i odrobinę brokatu na napis - i gotowe:
I only needed to add some liquid pearls drops and some glitter over the sentiment - and done:
Jeśli skorzystacie z tego kursu, zostawcie linki w komentarzach - chętnie obejrzę Wasze prace :-)
Milego dnia!
If you use my tutorial, leave the links in the comments - I'll be pleased to see your creations :-)
Have a nice day!
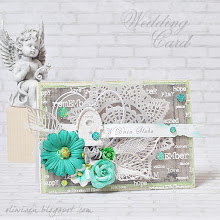
Po tworzeniu layoutów zawsze zostaje trochę ścinków - idealnie na parę kartek ;-) Z resztek czerwcowego kitu LE od My Creative Scrapbook zrobiłam trzy. Oto pierwsza, z kompozycją kwiatową wokół stempla:
After making some layouts there's always an amount of leftovers - perfect for a couple of cards ;-) And I made three using the leftovers of the June LE kit from My Creative Scrapbook. Here's the first one, with the flower cluster surrounding the stamped sentiment:
Na drugiej kartce wykorzystałam naklejki do utworzenia napisu - oraz ostatnie dwa kwiatki z zestawu ;-))
In the second card I used stickers for the sentiment - and the two last flowers of the kit ;-))
Na trzecią kartkę kwiatów brakło, więc wycięłam je z arkusza, z którego korzystałam również przy tym layoucie:
I didn't have any flowers left for the third card, so I cut them out from the paper I used also for this layout:
I to już wszystko, co udało mi się stworzyć z czerwcowego kitu MCS - zostało tylko kilka ścinków papierów i kawałki wstążek :-) Miłego dnia!
And that's all I managed to create using the June LE kit from MCS - I have only some scraps of papers left, and pieces of ribbons :-) Have a nice day!
Dzisiaj ostatni layout, jaki przygotowałam z czerwcowego kitu Limited Edition od My Creative Scrapbook. Znów różowo, dziewczęco i słodko :-)
Today I'm sharing the last layout I made from the June Limited Edition kit by My Creative Scrapbook. And it's pink, girly and sweet again :-)
Kit zawiera przepiękną Primową ramkę z masy - delikatnie przetarłam ją
złotą farbą, by uwydatnić zdobienia. Tytuł ułożyłam z piankowych literek i naklejek:
The kite contains a beautiful Prima resin frame - I brushed it over with gold metallic paint to make the ornaments pop out. Then I arranged the title using foam letters and stickers:
Kwiatowy wzór to przepiękna naklejka z arkusza Kaisercraft, którą nakleiłam na tle z desek:
The flower pattern is a gorgeous stickers from the Kaisercraft sheet that I applied onto the woodboard pattern background:
Do naklejek dodałam kompozycję z kwiatów przestrzennych:
I added dimensional flowers to the sticker ones:
Pomysł z pojedynczymi płatkami to -jak bardzo często u mnie - efekt przypadku i błędu, który postanowiłam przełożyć w zaletę ;-) Po prostu przy ścinaniu łodyżek ciachnęłam za mocno i kwiatek się rozleciał ;-) A przecież nie będę wyrzucać całkiem dobrych płatków! :-)))
The single petals idea was - as very often with me - the result of a coincidence and a mistake that I transformed into a value ;-) Simply, while cutting the stems off I cut one flower too much and it fell off ;-) And could I just throw away absolutely good petals? ;-)))
To ostatni kitowy layout, ale nie koniec prac - jutro zapraszam na kartki :-)
It's the last kit layout, but not the last project - drop by tomorrow for cards :-)
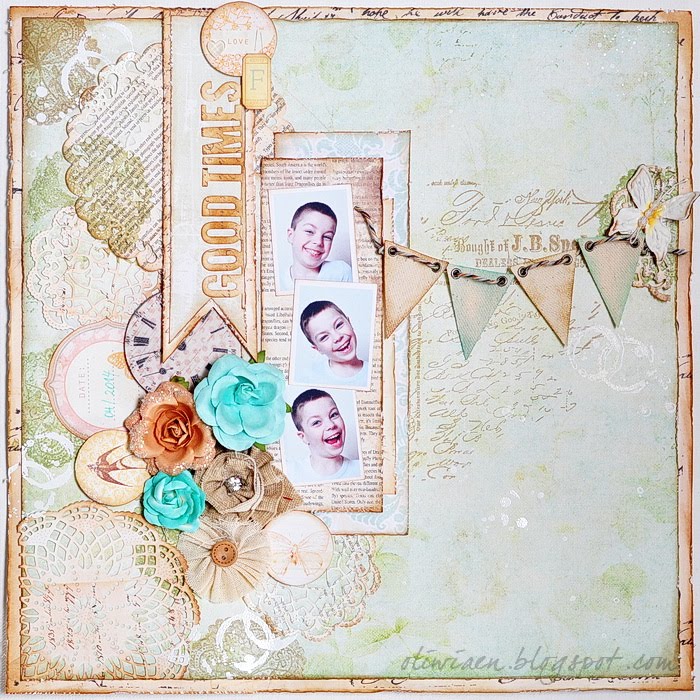
Spośród morza różowości czerwcowego kitu Limited Edition od MCS udało mi się wybrać również kilka papiery neutralne, szaro-zielone, idealne na layout chłopięcy ;-) I oto on:
In the heap of pinkness of the June Limited Edition kit from MCS I managed to select a couple of neutral, grey and green papers perfect for a boy page :-) And here it is:
Inspirując się wzorem papieru w tle kawałki arkuszy pod zdjęcie podarłam ręcznie i dodałam wzór odrysowując dołączony do kitu szablon białym żelpenem (tę samą maskę wykorzystałam przy tym layoucie do stemplowania):
I took inspiration from the background paper and tore the pieces to mat my photo. Then I added the pattern sketching the kit stencil with white gel pen (I used the same stencil to stamp through in this layout):
Tytuł ułożyłam z piankowych literek:
I formed the title using foam letters:
Różowe kwiaty zabarwiłam mgiełką z lutowego kitu ;-)
I painted the pink flowers with the chrome mist from the February kit ;-)
Misterną tekturową ramkę embossowałam pudrem vintage, a w ramach journalingu pocięłam na kawałki zadrukowany pasek sygnatury papieru :-)
I heat-embossed the filigree chipboard frame with vintage ep and cut the paper signature strip to make my journaling :-)
Zajrzyjcie jutro po kolejny dziewczęcy layout :-) Miłego dnia!
Drop by tomorrow for another girl page :-) Have a nice day!
Różowy i delikatny czerwcowy kit Limited Edition od My Creative Scrapbook świetnie nadaje się do dziewczęcych layotów. U mnie taki słodziak :-)
The pink and delicate June Limited Edition kit from My Creative Scrapbook is perfect for girl layouts. Here's my sweetie :-)
W tle ułożyłam warstwowo papiery i dołączoną do kitu bibułkową serwetkę:
In the background I layered papers and the paper doily included in the kit:
Brzegi papierów postarzyłam i naddarłam w kilku miejscach:
I distressed the edges of papers and tore them in several places;
Kwiaty przestrzenne połączyłam z tymi, które wycięłam z jednego z arkuszy:
I combined the dimensional flowers with the ones I cut out from one of the sheets:
Z siatkowej taśmy i wstążek z zestawu zrobiłam coś w rodzaju kokardy ;-)
I made a kind of a bow using the mesh and ribbons from the kit ;-)
Ciąg dalszy nastąpi :-)
To be continued :-)
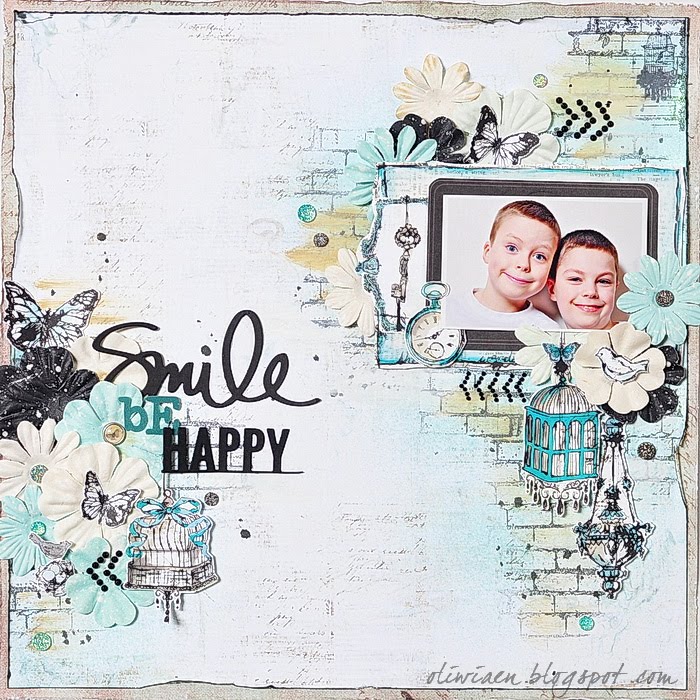
W czerwcu po raz kolejny mam wielką przyjemność gościć w My Creative Scrapbook i pracować z kitem Limited Edition. Podobnie jak poprzednie kity LE, i ten czerwcowy jest bardzo romantyczny, kobiecy, kwiatowy, głównie różowy ;-) - ale to nie znaczy, że nie da się użyć go do prac chłopięcych ;-) Oto dowód:
I have the great pleasure to be guest-designing for My Creative Scrapbook again and work with the June Limited Edition kit. Like the previous kits, the June one is very romantic, flowery and femine, mostly pink ;-) - but it doesn't mean you can't use it for boy themes ;-) Here's the proof:
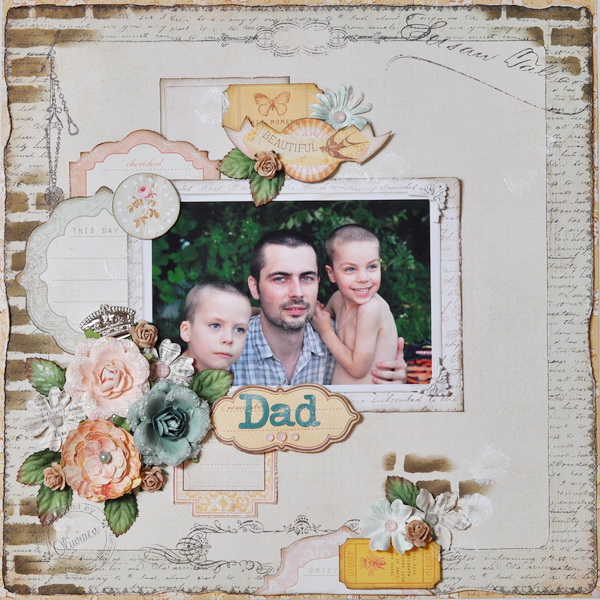
Pierwszy raz miałam okazję pracować z papierami 49 And Market - cudownie grube, z pięknymi, nostalgicznymi wzorami! Mam nadzieję, że będą dostępne również u nas. Tymczasem na moim layoucie dodałam w tle wzór, stemplując gazetowe tło przez maskę dołączoną do kitu:
I had the opportunity to use the 49 And Market papers for the first time - gorgeously thick, with beautiful designs! I do hope they are availabble in Poland too. In my layout I added a pattern on the background, stamping the newspaper motif through the stencil included in the kit:
Kawałki papierów Kaisercraft ułożyłam w kompozycję pod zdjęcie:
I matted the photo with pieces of the kit Kaisercraft papers:
Z papierów wycięłam również tagi i ozdobiłam je naklejkami Kaisercraft:
I also cut tags from the papers and decorated them with Kaisercraft stickers:
Piankowe naklejki ułożyłam w tytuł i pokryłam srebrnym brokatem.
I arranged the title using the kit foam alpha stickers that I covered with silver glitter:
W zestawie są tylko różowe kwiaty - ale tu pasują, czemu nie? :-)
The kit contains only pink flowers - but they fit in here, don't they? :-)
Zaglądajcie po kolejne prace - a przy okazji zgłoście się po kolekcję Sofiero :-)
Drop by for more projects - and take your chance in winning the Sofiero collection too :-)