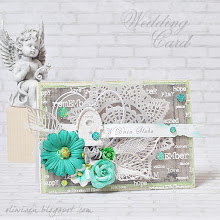
Dzisiaj w Lemonade rozpoczął się nowy cykl postów, Kurs na weekend. Co jakiś czas w soboty Projektantki będą prezentować rozmaite kursy - mnie przypadł w udziale pierwszy z nich, dlatego wybrałam coś bardzo łatwego: samodzielnie wykonaną przestrzenną różę. Chociaż wybór gotowych kwiatów mamy ogromny, to często są drogie, i trudno dobrać idealnie pasujący kolor czy oryginalny wzór.
Today at Lemonade we begin a new series of posts, in the category of Weekend Tutorials. From time to time, on Saturdays, the Lemonade Designers will present various tutorials - I was assigned the first one, so I chose something very easy, a handmade dimensional rose that I used in this card. Though teh choice of ready-made flowers is huge, they are often quite expensive, and it's difficult to find a perfect colour match or an original pattern.
Do
wykonania takiej róży potrzebne będą: kawałek papieru w wybranym wzorze, klej,
nożyczki, pędzelek (lub patyczek do szaszłyka) oraz dziurkacz lub
wykrojnik z motywem sześciopłatkowego kwiatka.
To
make your custom rose, you'll need: a piece of chosen paper, glue, a
pair of scissors, a thin brush (or a shashlik stick) and a punch or die
with a 6-petal flower motif.
1.
Z wybranego papieru wytnijcie cztery kwiatki. Jeśli chcecie postarzyć
lub ozdobić brzegi np. rysowanym ściegiem, zróbcie to teraz. Ja
potuszowałam brzegi brązowym tuszem:
Punch/die-cut
four flowers. If you want to distress or decorate teh edges, e.g. with a
drawn faux stitch, do it now. I inked the edges with some brown ink:
2.
Zagnijcie każdy kwiatek trzy razy, wzdłuż linii prostych pomiędzy
płatkami, jak na zdjęciu. W ten sposób zaznaczycie kształt
poszczególnych płatków i środek.
Fold
each flower three times along the straight lines between petals, as
shown in the photo. Thus you'll define the shape of individual petals
and the centre.
3.
Jeden kwiatek zostawcie w całości, drugi natnijcie raz wzdłuż zagiętej
linii, do środka, z trzeciego wytnijcie jeden płatek, a z czwartego
dwa. Powinniście teraz mieć takie elementy:
Leave
one flower unchanged, cut the second once along the folded line towards
the centre, cut out one petal from the third flower and two petals from
the fourth. Now you should have these elements:
4.
Na trzonku pędzelka lub patyczku wywińcie końce płatków na zewnątrz.
Doda to Waszym różom przestrzenności i naturalnego kształtu.
Using
the handle of the brush or the stick, fold the petals' edges outwards.
This will give your roses some dimension and a natural look.
5.
Odłóżcie na bok nierozcięty kwiatek. Złóżcie poszczególne płatki
pozostałych kwiatków wzdłuż linii i odetnijcie spiczaste czubki. Dzięki
temu łatwiej będzie skleić różę i będzie ona bardziej zwarta.
Put
the full flower aside. Fold the petals od the other flowers in along
the lines and cut off the pointed ends - this will make glueing the rose
easier and it'll be more closed and compact.
6.
Zagnijcie boki pojedynczego płatka do środka i sklejcie, pamiętając o
ładnym ułożeniu wywiniętego końca. Nie przejmujcie się białym fragmentem
- to będzie środek róży i widoczny będzie tylko wywinięty koniec. W ten
sam sposób sklejcie płatek podwójny.
Fold
the sides of the single petal inside and glue them together. Remember
to shape the folded end. Don't worry about the white part - this will be
the centre of the rose and only the folded end will be visible. Glue
the double petal in the same way.
7.
Teraz czas na pozostałe przycięte płatki. Załóżcie krańcowe płatki na
siebie i sklejcie - otrzymacie kielichy: trzy-, cztero- i pięciościenny:
Now
take the rest of the pre-cut petals. Put the opposite petals one over
the other and glue together. Thus you'll get three-, four- and
five-sided calyces:
8. Wszystkie elementy róży są teraz gotowe do złożenia:
Now all the rose elements are ready to assemble:
9. Sklejcie różę, wkładając mniejszy element w środek większego, zaczynając od środka:
Glue your rose together, putting a smaller element into the larger, starting with the centre:
10. I gotowe!
And you're done!
Miłego weekendu :-)
Have a nice weekend :-)


